How to Make a Planter From a Chair
14 June
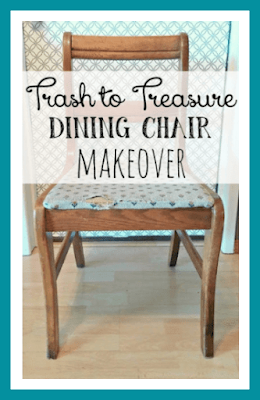
I found this old dining chair at a mini-storage sale and thought it would be perfect for a makeover.
Originally, I was just planning to paint and recover it.
But then I thought, what will I do with just one dining chair that doesn't match my other chairs?
So, I went in a completely different direction with this project and repurposed it instead. Read on to see how I transformed this lonely little chair into a cute planter.
How to Make a Planter From a Chair
This post contains some affiliate links for your convenience (which means if you make a purchase after clicking a link I will earn a small commission which helps keep my blog up and running but won't cost you a penny more)! As an Amazon Associate, I earn from qualifying purchases. Click here to read my full disclosure policy.
As I said, I found this chair at a storage unit sale. It was only $2.00.
Supplies You'll Need:
- An old wooden chair (thrift stores and yard sales are great places to find these)
- A piece of wood to make a new seat
- A jigsaw
- Sandpaper or a palm sander
- Paint in the colors of your choice
- A planter with a lip so it will rest inside the hole you'll cut in the chair seat (I recommend plastic for weight considerations)
- Clear sealer (optional)
- Accent pieces (optional)
- Stain (optional)
To make this cute planter chair follow these instructions:
Step One - Prep the Chair
If your chair has a seat, remove that. If the seat is made of wood or particle board, and you want to use it for a pattern to make your new seat board, remove any fabric or padding it may have.
Clean and sand the chair.
Step Two - Paint
If you plan to paint your chair a light color, then you'll want to prime it with stain-blocking primer first to prevent any bleed-through of the tannins in the wood (the stuff that bleeds through the paint and makes it look pink or orange and blotchy).
If you are painting it a dark color, you can skip this step.
I wanted my chair to have a dark base coat so I could distress it and have the dark show through the lighter, distressed coat. I used black spray paint for this step.
Step Three - Make the Chair Planter Seat
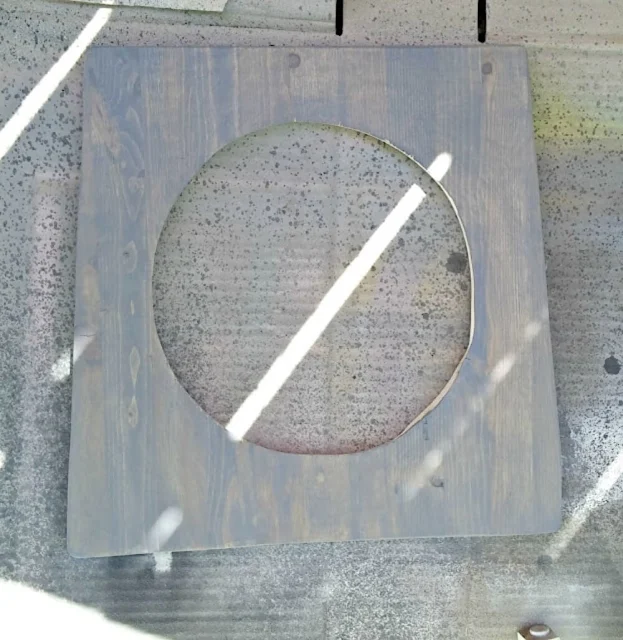
My chair had a chipboard seat that I used for a pattern for a new seat.
If your chair doesn't have a solid seat, you can measure and cut your wood to that size. If it does have a solid seat that you can use, trace that onto a new board and cut it out.
You can use scrap wood or purchase small pieces of pine board at Lowe's and Home Depot.
How you want to finish the seat will help you determine what kind of wood to use. If you plan to paint it, then scrap wood will be great. If you want to stain it, then a new board is best.
This is what chipboard looks like, some call this particle board. Even if you plan to paint the seat, I wouldn't recommend using this kind of wood. It's just ugly in my opinion and wasn't meant to be seen 😊
Now, use the planter you've picked out, flip it over, and trace around it on the center of your new board.
Draw another circle inside the traced circle. Make this about the same width as the lip of your planter. (NOTE: If you skip this step, your planter will fall right through the hole. This way, the lip of the planter will rest on the wood seat.
Cut out the inner (smaller) circle. To start cutting a circle out of the center of a piece of wood, drill a hole large enough for your saw blade to fit through right next to the cut line.
If you haven't already painted the chair the final color you've chosen, do that now. I chose to use off-white spray paint.
I recommend a coat of sealer if your chair will be exposed to the weather.
Sand and finish as you prefer. I chose to stain mine.
Attach the new wood seat to the chair base the same way the old one was attached. You can also just use heavy-duty wood glue or construction adhesive.
Step Four - Plant it
Plant some flowers in your new planter!
Here's a tip for planting an awesome planter - Spiller, thriller, filler 😃
Choose one thriller plant. This should be something taller than the other plants. Geraniums are great but it can even be something as simple as some tall grasses like I've chosen for mine... they act as a thriller even though they are not particularly thrilling on their own.
Choose one or two spiller plants. These should be plants that will trail and spill over the edges of the planter. Potato vines are a good choice as well as trailing lobelia. Just check the plant label and choose things that are labeled "creeping," or "trailing."
Choose a few (based on the size of your planter) filler plants. These should be plants that will fill in the gaps. I like to have flowering plants all summer so I chose petunias.
Step Five - Add details (optional)
The little doll is something my mom made for me YEARS ago! She's been outside so she's a little rough around the edges! I gave her some new bows on her shoes and in her hair and reattached her hand that had fallen off and now she's hanging from the chair.
I think she's perfect since she's holding a birdhouse. Check out my mom's shop full of adorable hand-painted things here: Tole-Tally Painted
Here are some other ideas for accenting your chair:
- If your chair has lots of details built-in like scrolls, spindles, etc., try accenting those with a different color of paint.
- Hang a sign from the back instead of painting one on.
- Hang a clay or metal sunshine sculpture to the back.
- Add a bird feeder or birdhouse (just be aware that they will poop on your chair) 💩
- Add a little figurine to the seat next to the planter (birds, frogs, bees, etc.)
This is sitting on my front porch now. I'm looking forward to seeing the flowers fill in.
Some of my blogging friends also completed some chair makeovers. You can see their projects at the links below:
Marie - The Interior Frugalista - Playful Scandinavian Half-Painted Chairs
Kandice - Just The Woods - Painting Outdoor Adirondack Chairs
Tuula - Thrifty Rebel Vintage - Repurposed Chair Bird Feeder
I hope that you enjoyed this post. If you did, please share it with a quick PIN!
PIN ME!
Posted by: Tania | Little Vintage Cottage
at 14 June
Tag:
DIY & Crafts


.jpg)
.jpg)


I LOVE this idea - both the chair and the Thrifty Chicks. I can't wait to see what all you talented ladies come up with.
ReplyDeleteThis is so creative. I will need to try this when I find another chair. This is so much fun.
ReplyDeleteThis is such a creative and adorable way to repurpose an old chair. Your Mom's wooden angel adds that fun whimsical touch along with the script on the back. Love the pop of turquoise too. Lovely way to welcome guests on your front porch, Tania!
ReplyDeleteLove this Tania! Perfect way to use an old chair. That pop of turquoise is so fun and the pink flowers will look awesome with it when they fill in.
ReplyDeleteThanks Tuula!
ReplyDeleteTania
Thanks Marie! At first I wasn't planning to keep it buy then I loved it and my front porch really needed help! lol!
ReplyDeleteTania
Thanks Debra! It was such an easy project!
ReplyDeleteTania
Thanks JoElle!
ReplyDeleteTania
this is so cute!! I have a few chairs sitting around that I should try this on
ReplyDeleteThank you so much Kandice!
ReplyDeleteTania
What a great make-over and such a nice welcome to your home. You did a smashing job of the lettering!!! I like your idea of limiting this to seven of you and I'll be watching.
ReplyDeleteThanks Vikki and I'm glad you enjoyed our challenge. I know what you mean about limiting the number of participants, it makes it so much nicer to be able to see all the projects without having the huge number of participants that are in the link parties! We may add one more participant though!
ReplyDeleteTania
That is awesome idea, Tania! Well done! I love all the finishing touches, especially that doll your mom made :)
ReplyDeleteThank you so much Jas!
ReplyDeleteTania
Cute project, and perfect for the season! I've got a couple extra chairs...;)
ReplyDeleteThanks Lora!
ReplyDeleteTania
A great makeover, Tania, and you make it look easy :-)
ReplyDeleteAmalia
xo
Thank you Amalia, this was one of the easier projects!
ReplyDeleteTania
So glad you are part of this group, I follow over half of them already and they are amazing women, perfect for you and your talents. I love all of the changes you have been making to the blog lately and look so forward to each new post.
ReplyDeleteThanks Amanda! I have followed a few of them too and then we discovered that we are all in the same online blogging class together so we created our own little Facebook group to support each other and then the Thrifty Chicks idea was born! It really was a lot of fun! I'm glad you like the changes and I'm glad you noticed! I am experimenting with getting the right mix of advertising now so please let me know if you see any issues or anything that just drives you bonkers! I really wish I could do it without advertising but it's a necessary evil if I'm going to ever take this full-time which is my dream :o)
ReplyDeleteTania
Good idea. It's so cute as a planter. Added to my Pinterest queue. Thanks for sharing at the To Grandmas House We Go link party.
ReplyDeleteThank you Stephanie!
ReplyDeleteTania
This is just adorable :) Thanks for sharing it with us at the To grandma's house we go link party - I'll be featuring this tomorrow morning when the new party starts!
ReplyDeleteYay! Thank you so much!!
ReplyDeleteTania