How to Make a Fireplace for Your Dollhouse
01 May
Now that I have shared the final reveal of my dollhouse kitchen I am ready to move on to other rooms of the house.
I will be focusing my energy on the living room for a while now!
To get started I wanted my dollhouse to have a fireplace because... well decorating a fireplace mantel is fun so decorating a miniature fireplace mantel would be even more fun! 😀
This post contains some affiliate links for your convenience (which means if you make a purchase after clicking a link I will earn a small commission which helps keep my blog up and running but it won't cost you a penny more)! Click here to read my full disclosure policy.
I will be focusing my energy on the living room for a while now!
To get started I wanted my dollhouse to have a fireplace because... well decorating a fireplace mantel is fun so decorating a miniature fireplace mantel would be even more fun! 😀
How to Make a Fireplace for Your Dollhouse
This post contains some affiliate links for your convenience (which means if you make a purchase after clicking a link I will earn a small commission which helps keep my blog up and running but it won't cost you a penny more)! Click here to read my full disclosure policy.
Supplies Needed
Scraps of thick cardboard
Empty egg carton
Aleene's Tacky Glue
Brick colored paints (I used Deep Burgundy, Georgia Clay, Lamp Black, and Sandstone)
Scraps of thick cardboard
Empty egg carton
Aleene's Tacky Glue
Brick colored paints (I used Deep Burgundy, Georgia Clay, Lamp Black, and Sandstone)
You'll use the cardboard to build the base for your fireplace. I used part of a piece of cardboard that came in some sheets for mine.
I'm not too concerned about scale in my dollhouse because it's already "not to scale" so I just measured inside the dollhouse to determine how tall I wanted the fireplace to be and subtracted about an inch from that measurement. Then determine how wide and deep you want your fireplace.
Cut a back, two sides, and a front to these measurements. Glue the sides to the back.
Once that is dry, glue the front and sides together.
Next, make a little hearth in the same way. This will make up for that inch that you shortened the measurement.
Now you'll use the egg carton to make bricks! It has just the right texture to make teeny-tiny bricks!
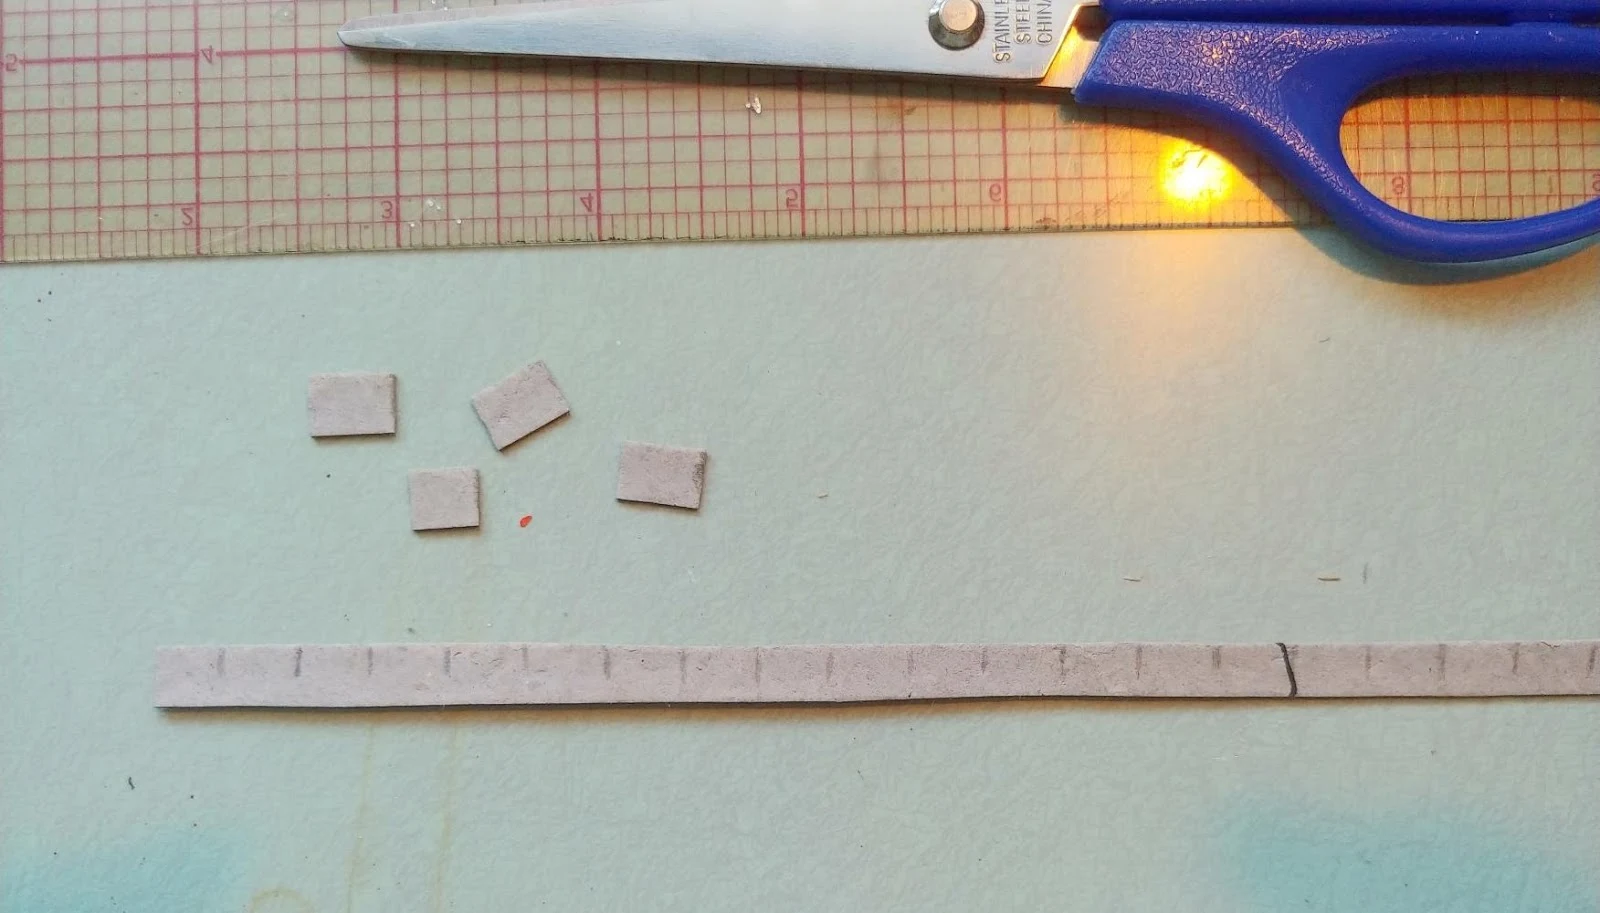
Cut a strip from the egg carton about 1/4" thick and then mark where you'll cut the bricks. I made my bricks in varying widths, 1/4" up to about 1" for those that will wrap around the corners.
Cut the corners ever so slightly to give them a rounded, worn look.
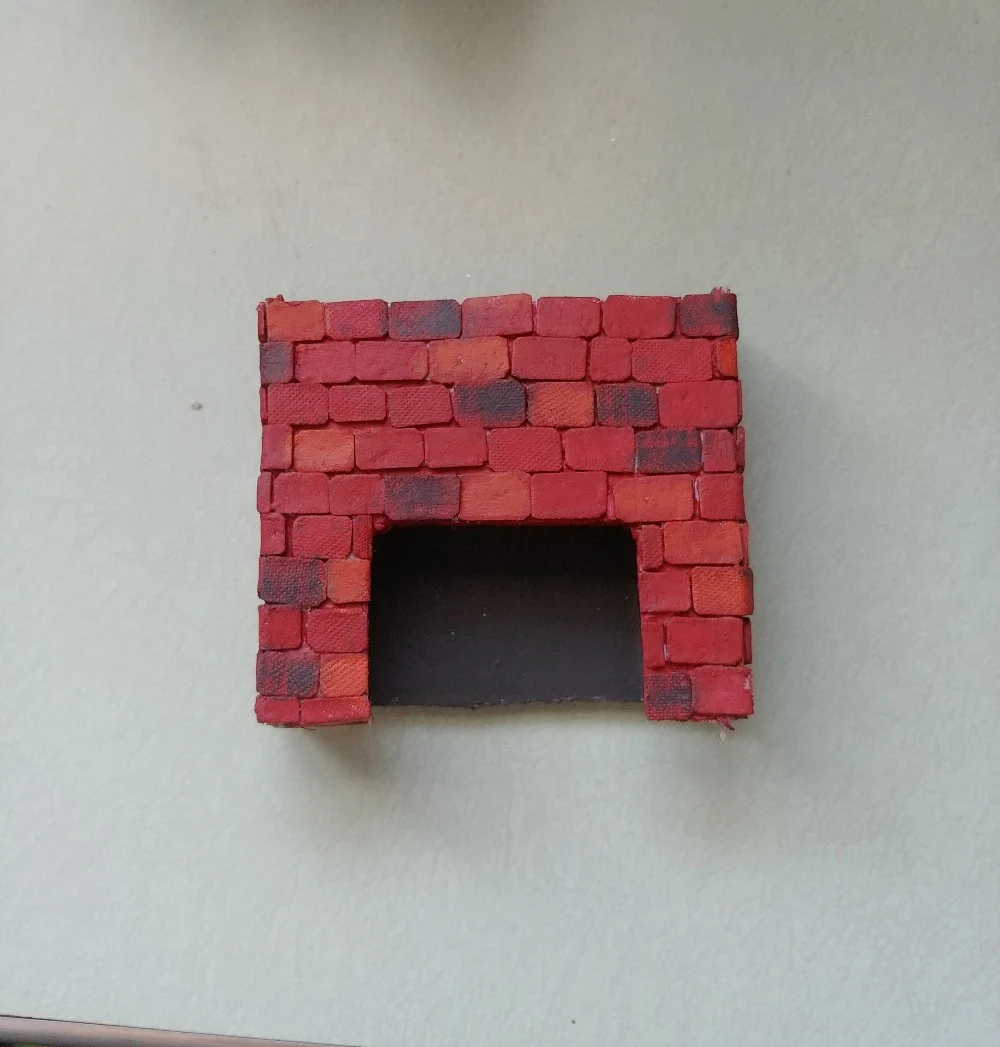
Glue the bricks onto the fireplace form. Make sure you stagger the seams for a realistic look.
These are the colors I used to paint the bricks to give them a realistic feel.
First, paint the whole thing in Deep Burgundy making sure to get it down in between the bricks.
Then dip a dry brush into some of the Lamp (Ebony) Black and wipe it a few times on a paper towel so there isn't much paint at all on the brush and then paint over a few of the bricks here and there.
Do the same thing with the Georgia Clay paint.
At this point, you could leave it as is... like a real, unpainted brick fireplace. I tried it in my house but just wasn't happy with it so I chose to do a wash of the Sandstone paint over the top. The wash was created with watered down paint and then I wiped off bricks here and there with a paper towel to allow some of the colors to show through a little.
You will also paint the inside of the fireplace black.
Glue the fireplace to the hearth. Then you'll need a mantle! I used some very rough and rustic wood scraps that I had from an old, broken picture frame. You could use smooth wood scraps if you like a less rustic look.
You might notice that my fireplace looks different still! That's because I still wasn't happy with the whitewashed look so I painted it light gray! Just call me Miss indecisive! 😉
I really wanted a picture of the popular Highland Cow in my dollhouse somewhere and above the fireplace seemed like a great place! I just happened to have some tiny little frames! I printed the cow in the size I needed and voila!
What do you think??
You can see that I smudged some black around the fireplace opening to give the look of a fireplace that gets used! I just used my finger!
You can see what I used for the wall behind the fireplace here: Dollhouse Living Room - Scrapbook Paper Floor & Tissue Box Walls
The logs are cut from twigs (these are from my childhood dollhouse) and I also already had the little fireplace tools!
I am so pleased with how this turned out, I can't wait to find a few things to put on the mantel!
PIN ME!
Posted by: Tania | Little Vintage Cottage
at 01 May
Tag:
DIY & Crafts


Comments by Blogger
Post a Comment
I love your comments! If you want to be notified when I respond to you, check the "Notify Me" button under your comment.