Guess what today is?!
I'll give you a little hint... it happens once a year and it involves thrift stores!
It's National Thrift Shop Day!! 😍
Thrift shopping and finding things to makeover is a big thing here at LVC and I assume a big part of the reason that you follow along! So, in honor of this important day, each year I do 7 days of thrift shop flips!
I have been doing this for five years now, can you believe that?! If you are new, each day for 7 consecutive days I post a thrift shop flip where I repurpose and reimagine things I've found at my favorite thrift stores.
Today is Day one!
This year, since we are in the middle of a pandemic and the thrift stores have been closed for months I am focusing on items that you may already have lying around the house...or if the thrift stores where you live have reopened you'll easily be able to find what you need to recreate the projects I'll be sharing. Every thrift shop known to man will have the items I'll be upcycling this week😁
Upcycled Sugar Bowl Pin Cushion - 7 Days of Thrift Shop Flips
This post contains some affiliate links for your convenience (which means if you make a purchase after clicking a link I will earn a small commission which helps keep my blog up and running but it won't cost you a penny more)! Click here to read my full disclosure policy.
Supplies You'll Need:
- Orphaned sugar bowl (or creamer)
- Pretty fabric scrap
- Styrofoam egg (you may need a ball or other shape depending on the opening of your vessel)
- White glue (I use Aleene's Tacky Glue)
- Hot glue
- Poly-pellets (or something to add weight to the bowl)
- Trims of your choice (lace, ribbon, vintage button, etc.)
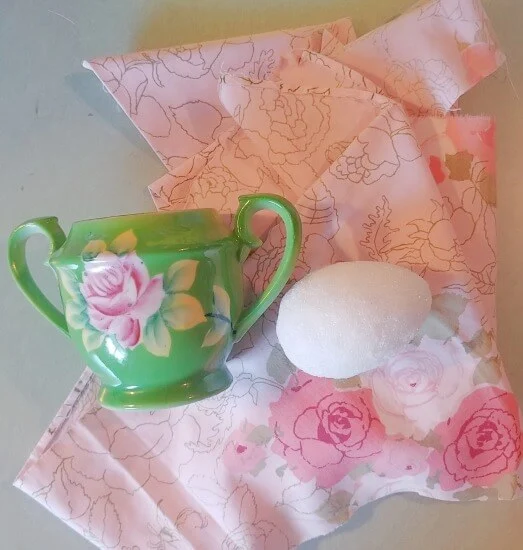
This little sugar bowl was missing its lid so I thought it would be perfect for a repurposing project. The fabric I chose is part of a vintage pillowcase. I thought it went well with the pink rose on the sugar bowl I'm using.
You don't need very much fabric at all, just a little scrap that will cover the styrofoam.
You may need to shave off some of your styrofoam shape to make it fit snugly into the sugar bowl. Use a utility knife and just shave off little bits at a time. Not too much, you want it to fit snugly but not push all the way through when pressure is applied.
Fill the bottom part of the sugar bowl with plastic pellets. This will give it some weight so it won't tip over every time you try to add or remove pins and it will also help with the styrofoam staying in place.
I like poly-pellets that are used for making stuffed animals but you could also use rocks or anything that you have that will add weight.
Test fit your styrofoam piece.
Put some glue on the sides of the styrofoam shape. Don't put it on the top because that will make it hard to get the pins into your new pincushion when you're done.
Wrap the fabric around it and hold it in place with a rubber band while it dries. You can pull gently on the edges of the fabric to smooth out the wrinkles and the rubber band will hold it in place.
Put a bead of glue around the edge of the sugar bowl and nestle your fabric covered styrofoam shape down into the opening of your sugar bowl. (I left the rubber band around mine because it made it fit really nicely and snugly).
Pick out a couple of trims that you like. I used a piece of vintage lace and tiny pink pom-pom trim.
Put a bead of hot glue around the inside edge of the sugar bowl and add the ribbon trim. I used hot glue for this part because it would have been hard to keep the trim in place while regular glue dried. Don't worry if it doesn't lay very flat or look too pretty, the next piece of trim will cover that up.😉
Add your second piece of trim over the top of the first.
Pick some pretty ribbon for a little bow. I love using vintage seam binding tape. I always buy it when I see it and wash it in a lingerie bag for that pretty crinkly, wrinkly look💗
Just tie a simple bow and add it to the side with a dot of glue.
Then add a vintage button over the center of the bow if you like.
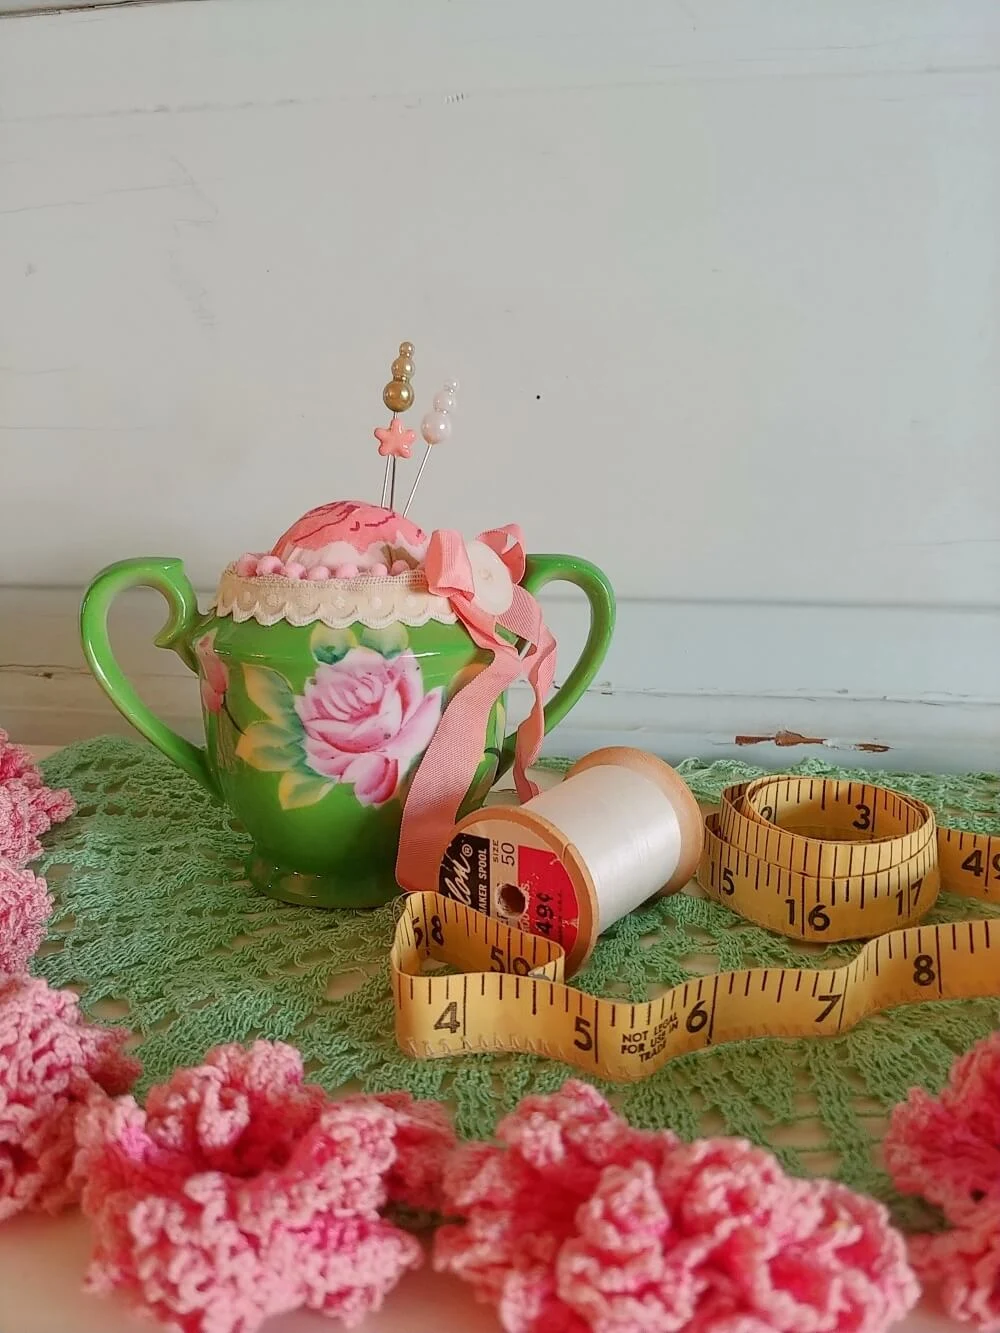
Add some cute, decorative pins and you're done!
Cute right?!
This sugar bowl is marked "Made in Occupied Japan." America occupied Japan from 1945 to 1952 and in 1947 it was ordered that all products made for export be marked "Occupied Japan," or "Made in Occupied Japan." So this little cutie is pretty old! I'm so glad I was able to repurpose it into something pretty and useful!
PIN ME!
I hope you enjoyed this project, do you think you'd like to make one?
Tomorrow I will be sharing something that you can make from old sweaters!


This is simply DARLING!
ReplyDeleteI love it!
I think I’d like to make one for my mom, with a teapot! She collects teapots AND sews! And I love vintage!
I’m gonna poke around your site a bit. So far I’m liking it!
If you have the time, please come by the Homestead Blog Hop every week and share with us! I always like to see the vintage flair added into today’s ideas.
Blessings,
Laurie
Here’s a link to the blog hop pages.
https://www.ridgehavenhomestead.com/category/homestead-blog-hop/
Thank you so much Laurie! Making one with a teapot would be so cute! Thanks for the link to your hop, I've entered a few projects there :o)
DeleteTania