Upcycled Sweater Sleeve Pumpkins - 7 Days of Thrift Shop Flips

18 August

 Welcome to Day Two of 7 Days of Thrift Shop Flips!

Yesterday I mentioned that I am focusing on upcycling things that you can find at virtually every thrift store known to man or you may already have what you need at home!

Today's item is sweaters... sweater sleeves actually! And we are going to make some super cute, no-sew pumpkins! I don't usually do fall-themed crafts in the 7 Days projects but fall is right around the corner so I thought we could get a jump start!

Upcycled Sweater Sleeve Pumpkins - 7 Days of Thrift Shop Flips

thrifted sweaters
This post contains some affiliate links for your convenience (which means if you make a purchase after clicking a link I will earn a small commission which helps keep my blog up and running but it won't cost you a penny more)! Click here to read my full disclosure policy.


Supplies Needed
  • Thrifted sweaters
  • Jute twine
  • Cotton string or embroidery floss to match your sweater colors
  • Stuffing
  • Large needle
  • Regular needle and thread
  • Poly-pellets (optional)
  • Hot glue
  • Fabric to make leaves
  • Phoomph for fabric (optional)
  • Vintage Buttons (optional)

7 Days of Thrift Shop Flips

Ok, let's make adorable little sweater pumpkins!!😀

To begin, cut some lengths from your sweater sleeves. It won't take much, you can get 2, maybe 3 pumpkins per sleeve.

cut a length from the sweater sleeve

Turn the sleeve piece inside out and tie one end with jute twine, as tight as you can.

tie one end with twine

Turn it right-side out.

turn right side out

Stuff it until it's the size you like and you still have some of the top unstuffed.

stuff

If your sweater is very tightly woven you can add poly-pellets to give your pumpkin some weight (cable knit won't work for this optional step).

add poly-pellets for weight

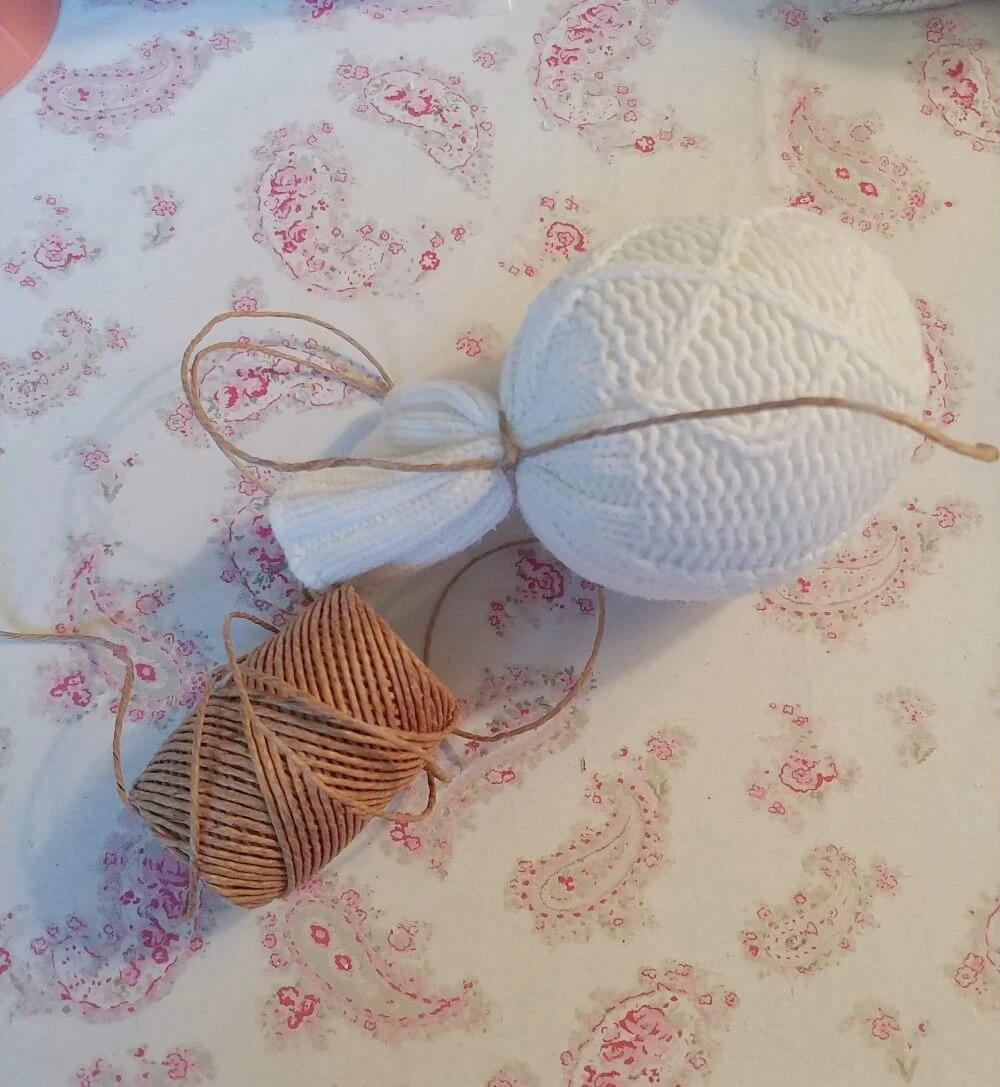
Tie off the top, close to the stuffing, with twine but don't cut the twine, leave the roll attached. You'll be wrapping the stem next and you'll need the extra.

tie off the top

Begin wrapping around and around the top of the sweater fabric keeping the twine as close together as possible for good coverage. Once your stem is as long as you'd like, trim off the rest of the sweater fabric.

wrap the stem with twine

Cover the top, cut edge with more twine using hot glue. You can go in circles like I did or back and forth, whatever works best for you. (Be careful! I have burned myself with hot glue so many times I don't think I have any fingerprints left! 😂)

wrap the stem with twine

Next, you'll make the lines on the sides of the pumpkins... I don't know what they are called but they make the pumpkins squishy and plump looking... like real pumpkins!

Choose cotton string or embroidery floss that matches the color of your sweaters you are using.

choose cotton string to match

Thread a large needle with the thread and knot the end. Hide the knot by inserting the needle under one of the folds on the bottom.

make the pumpkin lines

Now, at the top, insert the needle down into the pumpkin right next to the stem. So, your string will come up, around the side of the pumpkin... I hope that makes sense. Pull it as tight as you can so the pumpkin squishes out around the sides.

use string to make the sides of the pumpkin

Push your needle through and come out at the bottom. Now do the same thing again... up and around the side, down through the top... do this 4 times and spread them out evenly around the pumpkin pulling as tight as you can each time. Knot the thread at the bottom.

stitch the pumpkin sides

Now let's make some leaves!

You can make leaves with felt, use silk flower leaves, or use this cool stuff called Phoomph for fabric! The link for this is up in the supply list. This is a thick, double-sided, self-adhesive stuff. You stick the fabric of your choice on either side so you can have coordinating or contrasting double-sided fabrics!

Phoomph for fabric

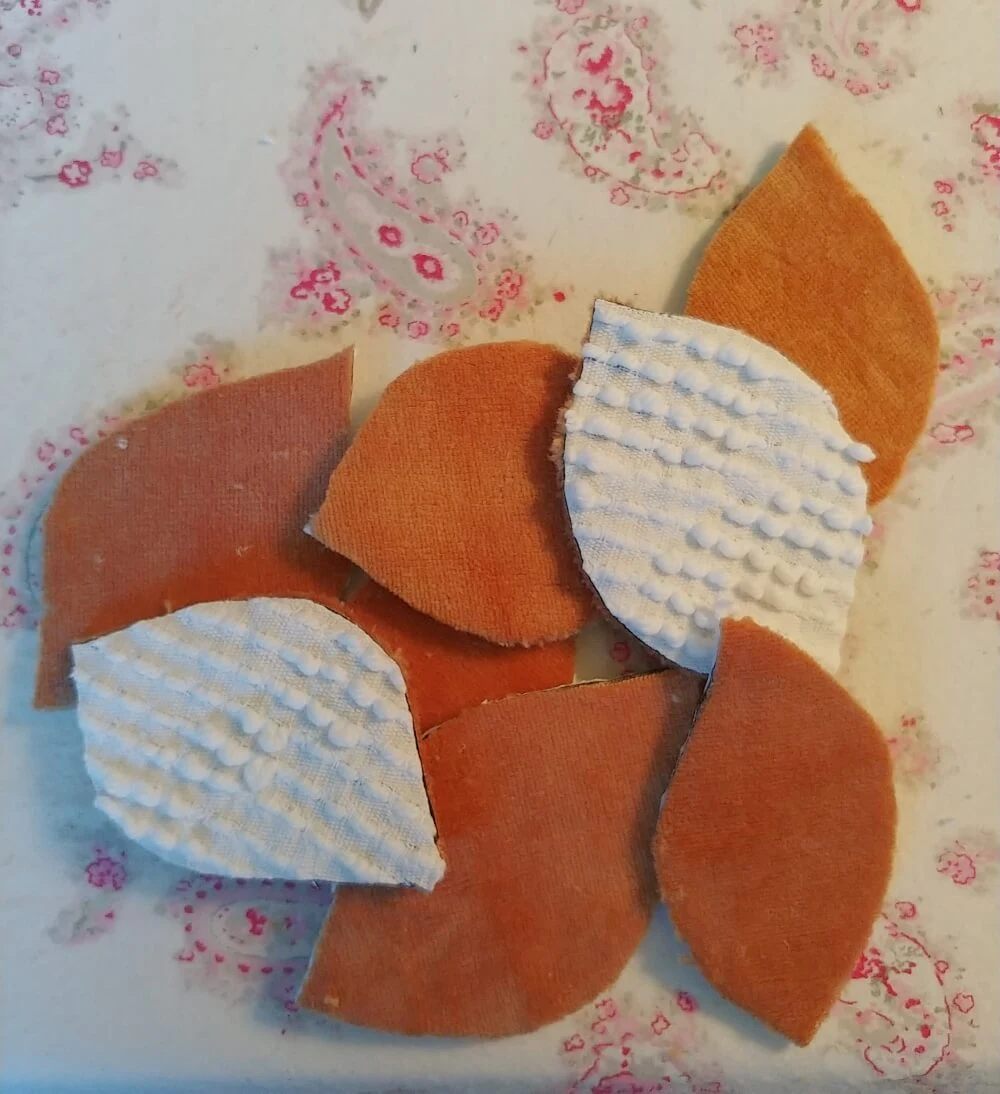
I chose some golden velvety fabric and a vintage chenille scrap to make my leaves.

fabric for leaves

Once you stick the fabrics on either side of the Phoomph it looks like this.

fabric on phoomph

Cut out some leaf shapes that you like. Real pumpkin leaves are a little fancier than this but I thought simple was better!

phoomph leaves

I used a needle and thread to stitch the leaves closed at the bottom so they aren't so flat and to give them shape. You could probably also glue them.

stitch the bottoms of the leaves together

Glue a couple of leaves to each pumpkin.

Add the leaves to the pumpkins

I added vintage buttons to mine too.

add vintage buttons

These were really fun and easy to make!

white sweater pumpkins on toy truck

Upcycled Sweater Sleeve Pumpkins

Aren't they cute on the toy truck?!

DIY Sweater Sleeve Pumpkins

I ended up with a white, cable knit pumpkin, a creamy, off-white pumpkin...

white sweater pumpkins

... and a cute grey cable knit pumpkin!

No-sew sweater pumpkins

cute sweater pumpkin DIY

DIY no-sew sweater pumpkins

how to make sweater pumpkins

I could see a bunch of these in a basket too!

sweater pumpkin tutorial

PIN ME!!
Upcycled Sweater Sleeve Pumpkins - 7 Days of Thrift Shop Flips
For tomorrow's project, I'll be using this old Reader's Digest book and yardstick!

Supplies for 7 Days of Thrift Shop Flips, Day 3

And if you missed yesterday's (day one) project, you can see it here: Upcycled Sugar Bowl Pincushion!
Posted by: at 18 August Tag:

Comments by Facebook

Comments by Blogger